Showing posts with label Schoolhouse Crew. Show all posts

Wednesday, November 8, 2017

Innovators Tribe {Homeschool Crew Review}

Innovators Tribe

One of the best parts about homeschool science is that it's usually easy to add in cool hands-on projects and experiments. Innovators Tribe has developed entire online courses that seamlessly integrate learning videos, hands-on activities, and design challenges to make a fun learning experiences for middle and high school students. Lauren (and my husband Tim) have been using the Thinking Like an Engineer program recently. It is serving a dual purpose around here --both  introducing engineering concepts and providing resources for the Science Olympiad Roller Coaster event.

Thinking Like an Engineer

Thinking Like an Engineer is an introductory course designed to expose students to the math and science skills used by engineers and to show them practical examples of what sorts of problems engineers solve.

The course syllabus outlines learning objectives for this course:


Wow! It looks like that list would make a pretty good exam for a high schooler. Since Lauren is only in sixth grade and hasn't had a lot of previous science experience, my primary goal was for her to have an enjoyable (not stressful) experience exploring engineering concepts. Since she had already signed up for our homeschool Science Olympiad team and asked to be on the Roller Coaster build team, I also hoped that she'd be able to glean some helpful construction tips.

The program turned out to be far more than we ever imagined. Tim and Lauren skipped ahead a bit and started with the third unit -- Engineering Rollercoasters. The online coursework portion included a bit of video instruction, links to video explanations, and a short comprehension/memory quiz at the end.


Lauren learned a bit about the difference between potential and kinetic energy:


She was then introduced to some simple physics equations to calculate each:


Finally, with a bit of help from Dad, she was able to determine all sorts of information, including how high the first hill needed to be in order for the roller coaster to make it around a loop.


She doesn't fully understand the equations, but she did grasp the concept that making the hill higher meant that the roller coaster car would be going faster and could therefore make it around the loop. Her Science Olympiad roller coaster probably won't have any loops, but it will need the marbles to go fast enough to jump from one section of track to another.

Our engineers then moved on to the coolest part of the roller coaster unit -- making a model roller coaster out of paper. Thinking Like an Engineer provided paper templates and complete instructions. We printed out the templates on cardstock and were ready to start building. Lauren and her teammate were easily able to construct the track and start experimenting to see how far they could get their marble to jump. (Since their Science Olympiad event gives bonus points based on horizontal gaps in the track, we are focused right now on getting the marble to make successful jumps instead of doing cool loops and twists.)


What could be cooler than designing your own roller coaster? I'm not sure, but it could be building a tower out of four sheets of paper and one foot of masking tape (unit 1), experimenting with 3D computer design software (units 2 and 5), or designing a bridge (unit 4).


I love when science concepts become real with hands-on activities and not just pages of reading assignments. Innovators Tribe makes engineering fun by teaching students how to Think Like an Engineer with this course. They also offer a Think Like an Architect program that promises to be equally exciting.

Thinking Like an Architect or Engineer {Innovators Tribe Reviews}

Crew Disclaimer

©2009-2017 Through the Calm and Through the Storm. All rights reserved. Photos and content may not be reproduced. http://throughthecalmandthroughthestorm.blogspot.com

Wednesday, October 18, 2017

The Pencil Grip, Inc. {Homeschool Crew Review}

The Pencil Grip, Inc.
Over the past fourteen years of homeschooling, I think I have bought a few dozen different types of pencil grips in the hopes of teaching my kids proper handwriting form. Recently, Lauren has been trying The 3 Step Pencil Grip Training Set from The Pencil Grip, Inc. It is a unique step-by-step approach to establishing a correct way to hold a pencil. We also received The Ultra Safe Safety Scissors to try out.


I cringe every time I see Addison write because she wraps her index finger all the way up the pencil. Fortunately, she still manages to write efficiently with an awkward grip and doesn't have trouble with hand fatigue. Her handwriting is actually quite pretty. Brennan and Lauren have similarly awkward pencil grips. I figure that it's too late to teach Brennan new ways (I've tried for years), but I still try to encourage Lauren to use a pencil grip that will put less stress on her fingers and joints.

My biggest concern with Lauren is that she grips the pencil too tightly and hyper-extends some of the joints in her fingers. She also wraps her thumb completely around the pencil, putting even more pressure on the tip of her index finger.


The three pencil grips that we received move a child in a step-by-step fashion from what appears to be the most supportive device to the one with least support. I suggested that Lauren start with The Crossover Grip which is intended for training. It provides a "super hero cape" (the company's words) to reinforce proper finger positioning. As you can see, it does ensure that Lauren doesn't wrap her thumb around the pencil.


Before long, however, she asked to try some of the other, smaller pencil grips. I gave her the other two and let her choose her favorite. She now prefers The Pinch Grip, which is labeled for transition. She likes the way that this grip is less bulky than the first one she tried. At the same time, though, her fingers fit securely in place.


We keep The Pencil Grip Original in her backpack along with The Pinch Grip so that she has another option to pick between. It's a bit more streamlined, but I think she finds it difficult to figure out which way to correctly position her fingers on it.


I'm thrilled that The 3-Step Pencil Grip Training Kit included all three of the pencil grips so that Lauren could try each one out and settle on the one most comfortable for her to use.

Our other fun product from The Pencil Grip was a set of The Ultra Safe Safety Scissors. The blades for these scissors are enclosed in a permanent plastic safety shield so that the sharp blades are completely enclosed. I like the spring action of the scissor handles, but I found it difficult to correctly position the paper to slip it into the area between the guard and the opposite blade. Even with the blade, I think these scissor should still be used with supervision. It would be almost impossible for a child to cut their fingers while using these, but it wouldn't be difficult to slip hair into the scissors for an impromptu hair cut. Since I tend to worry about unintended haircuts and important papers that I don't want destroyed, these aren't a pair of scissors I'd leave in a toddler's reach when I couldn't supervise.

The 3 Step Pencil Grip Training Set and The Ultra Safe Safety Scissors are both available from Amazon. The Pencil Grip, Inc. also makes Thin Stix and Kwik Stix, quick-drying tempera paint markers which have been a big hit in our house.

Ultra Safe Safety Scissors & Pencil Grip Training Kit {The Pencil Grip, Inc. Reviews}

Crew Disclaimer

©2009-2017 Through the Calm and Through the Storm. All rights reserved. Photos and content may not be reproduced. http://throughthecalmandthroughthestorm.blogspot.com

Wednesday, October 11, 2017

The Brinkman Adventures {Homeschool Crew Review}

Brinkman Adventures

I feel like all I talk about on my blog lately is how we're doing more schoolwork in the car than at home lately. I've found plenty of printable activities for the car -- some from our regular curriculum and some from new sources. Those work great for appointments later in the day, but we often find ourselves on the road very early in the morning. When it's too dark for reading or worksheets, I turn to educational materials that Lauren can listen to.

Our most recent addition to our early morning commutes is Brinkman Adventures. Over the past several years, we've listened to several seasons of this audio drama series, and I was excited to add a digital copy of Brinkman Adventures Season 4 to my iPhone playlist.

Brinkman Adventures

Each season of The Brinkman Adventures includes twelve episodes, each about half an hour long. (Lauren would insist that I say that they just a few seconds short of 26 minutes long.) Lauren enjoys the fact that these are audio dramas with different voice actors for each character, sound effects, and music. She much prefers these dramatizations over an audio book where a story is simply read by a single narrator.

One thing I enjoy about listening to The Brinkman Adventures is that they are all cohesive in terms of telling an ongoing story, but they aren't all exactly the same.

Some episodes focus completely on a true missionary story. For instance, Episode 38 talks with Carl Ralston in Cambodia and tells the story of Nhu, a young girl who was sold into slavery. Lauren was excited to hear in the afterward that Nhu herself did the voices in the drama. I was also able to show her a picture of Carl, his wife Laura, and Nhu on the Brinkman Adventures website.

Other episodes focus more on the fictional Brinkman family. The first episode in Season 4 includes crazy adventures at a missionary family camp, a tornado warning during a late-night hide and seek style game, the birth of a baby, and a scripture verse written on a found balloon. A later episode tells the crazy antics of Ian Brinkman developing a computer-controlled vehicle carrying a paintball gun to help their neighbor Mr. Pennington wage war against the raccoons that ate his favorite Koi fish.

During most of the episodes, it was just Lauren and me listening to the drama. A few times, however, we had most of the family in the car. Brennan and Tim both listened to a few episodes while we were traveling a few weeks ago. Most of the episodes stand alone so it was easy for them to join us in the middle of the season. There are only a few that carry over from one episode to the next, and I don't remember any that span more than two episodes.

One thing I love about these dramas is how they spark family discussions. For instance, an episode told the story of a man who was healed after he turned away from the witch doctors in his area and called upon the name of Jesus. My husband pointed out that God can work in miraculous ways like this, but that the absence of God's healing does not mean that God is not still in control or that God does not love the person who prayed for healing.


Brinkman Adventures audio dramas have certainly been a bright addition to our early morning commutes to doctor's appointments. In past years, we've also listened to Season 2 and Season 3.  Apparently we've never listened to Season 1 and there are now six episodes in Season 5. I sense a lot more missionary learning opportunities during our commutes this winter.

Brinkman Adventures Season 4

Crew Disclaimer

©2009-2017 Through the Calm and Through the Storm. All rights reserved. Photos and content may not be reproduced. http://throughthecalmandthroughthestorm.blogspot.com

Tuesday, August 8, 2017

No Nonesense Algebra for Accelerated Math Students {Homeschool Crew Review}

When looking at Brennan's math books for this coming school year, it looks like I either have more high school students in my house than everybody thought or that I've completely lost my mind. He will be using No-Nonsense Algebra from Math Essentials in conjunction with the Calculus books for his regular math curriculum.

No-Nonsense Algebra

I know it doesn't look like it would make any sense at all. Recently, I figured out that standardized college entrance exams can be a challenge for accelerated math students. Addison finished Calculus I as a high school sophomore and moved on to Calculus B/C during her junior year. Brennan will be taking Calculus I during his junior year. I specifically looked at their junior years because that's the year that taking the PSAT counts for the National Merit Scholarship Competition (and a National Merit Scholarship can pay for a lot of college expenses). The issue is that the PSAT/SAT/ACT exams are based on a traditional math sequence where many students do not take math classes past Algebra 2 or Pre-Calculus. The vast majority of the math covered on the college entrance exams is based on pre-algebra calculation skills, some basic algebra manipulation, and a bit of geometry knowledge. One website claims that only 4 out of 50 math questions on the SAT requires basic trigonometry. My advanced math students were so far removed from elementary algebra concepts that they struggled more than if they had taken these exams a few years earlier.

That's where No-Nonsense Algebra steps in. This fall, Brennan will be using No-Nonsense Algebra to refresh his memory on math terminology, basic computation skills, and algebra so that those concepts won't look so foreign to him when he encounters them on the PSAT in October.

The first chapter of No-Nonsense Algebra covers a lot of pre-algebra topics, including basic computation skills that many advanced math students may have forgotten. (Both of the engineers in our house rely heavily on their calculators and would grumble if they were forced to do calculations with only a paper/pencil the way it is tested on certain sections of college entrance exams.)


What I love about Math Essentials is that the concepts are broken down into simple, easily-understood explanations. For nearly all of the topics, the explanation takes about half a page, an example problem takes another half a page, and then there is a single page of practice problems (and never more than 20 problems to work).


Because these concepts are all review for Brennan, he generally only needs the short explanation in the book. The No-Nonsense Algebra book includes an access code that unlocks short instructional videos for each topic as well. Each of these videos is approximately 8-10 minute long. Short enough to keep a busy student's attention span, but long enough to fully explain the concept.

I remember quite a bit of algebra concepts when it comes to solving basic calculation problems, so I turned to the last section of the book -- word problems. It contained several topics that I remember being particularly challenging.


I started with "Time, Rate, and Distance Problems" because I remember the challenges of train and car problems. I like the way Math Essentials broke these sorts of word problems down into four distinct types.


After reading the explanation and examples, I tried one on my own.


I then moved on to the "Mixture Problems." This time I skipped over the book introductions and examples and just watched the video. He gave a very clear explanation of how to solve the problem, and I felt confident enough to tackle the four exercise problems for this section.

Now that I've mastered (once again) the quadratic equations, train problems, and mixture problems, I'm ready to face the world, including the advanced physics class I'm going to be teaching this fall. More importantly, I'm confident that the lessons in No-Nonsense Algebra will help Brennan be prepared to ace the "easy" algebra questions on the PSAT.

After working with the No-Nonsense Algebra for a while, I looked to see what other topics Math Essentials covers. I was happy to see that they offer books on elementary math concepts, specific topics such as fractions or decimals/percents, geometry, problem solving, and mastering essential math skills (pre-algebra concepts). I was particularly interested in their Problem Solving book and just ordered it for Lauren. It starts with simple one-step word problems and moves into increasingly more complex problems, including those that will require two or even three steps to reach the answer.

No-Nonsense Algebra {Math Essentials Reviews}

Crew Disclaimer

©2009-2017 Through the Calm and Through the Storm. All rights reserved. Photos and content may not be reproduced. http://throughthecalmandthroughthestorm.blogspot.com

Monday, July 10, 2017

Home School in the Woods Timeline Trio {Homeschool Crew Review}

Home School in the Woods

One of our favorite companies for finding hands-on history activities is Home School in the Woods. In the past, we've used their Lap Paks to study "The 20th Century in America" and "U.S. Elections." For our latest review, though, we didn't study a particular historical event or time period. Instead, we have been using the HISTORY Through the Ages Timeline Trio so that Lauren can get a better grasp of how different historical events overlap and interact with each other.


Lauren has worked with timelines a bit in the past, but we've never done a big timeline that captured events for more than a single unit study. This timeline set is able to handle all of her history studies for the rest of her school days.

I unwrapped the HISTORY Through the Ages book and was immediately impressed with the quality of this timeline. It is a 12.5" x 9" hardcover binder that allows the included cardstock pages to lay flat when working (or browsing) through the dates. The pages are preprinted starting at 5000 BC and go through 2025 AD. The scale of the pages varies with some of the earliest pages covering 500-1000 years and the most recent pages only covering 5 years.


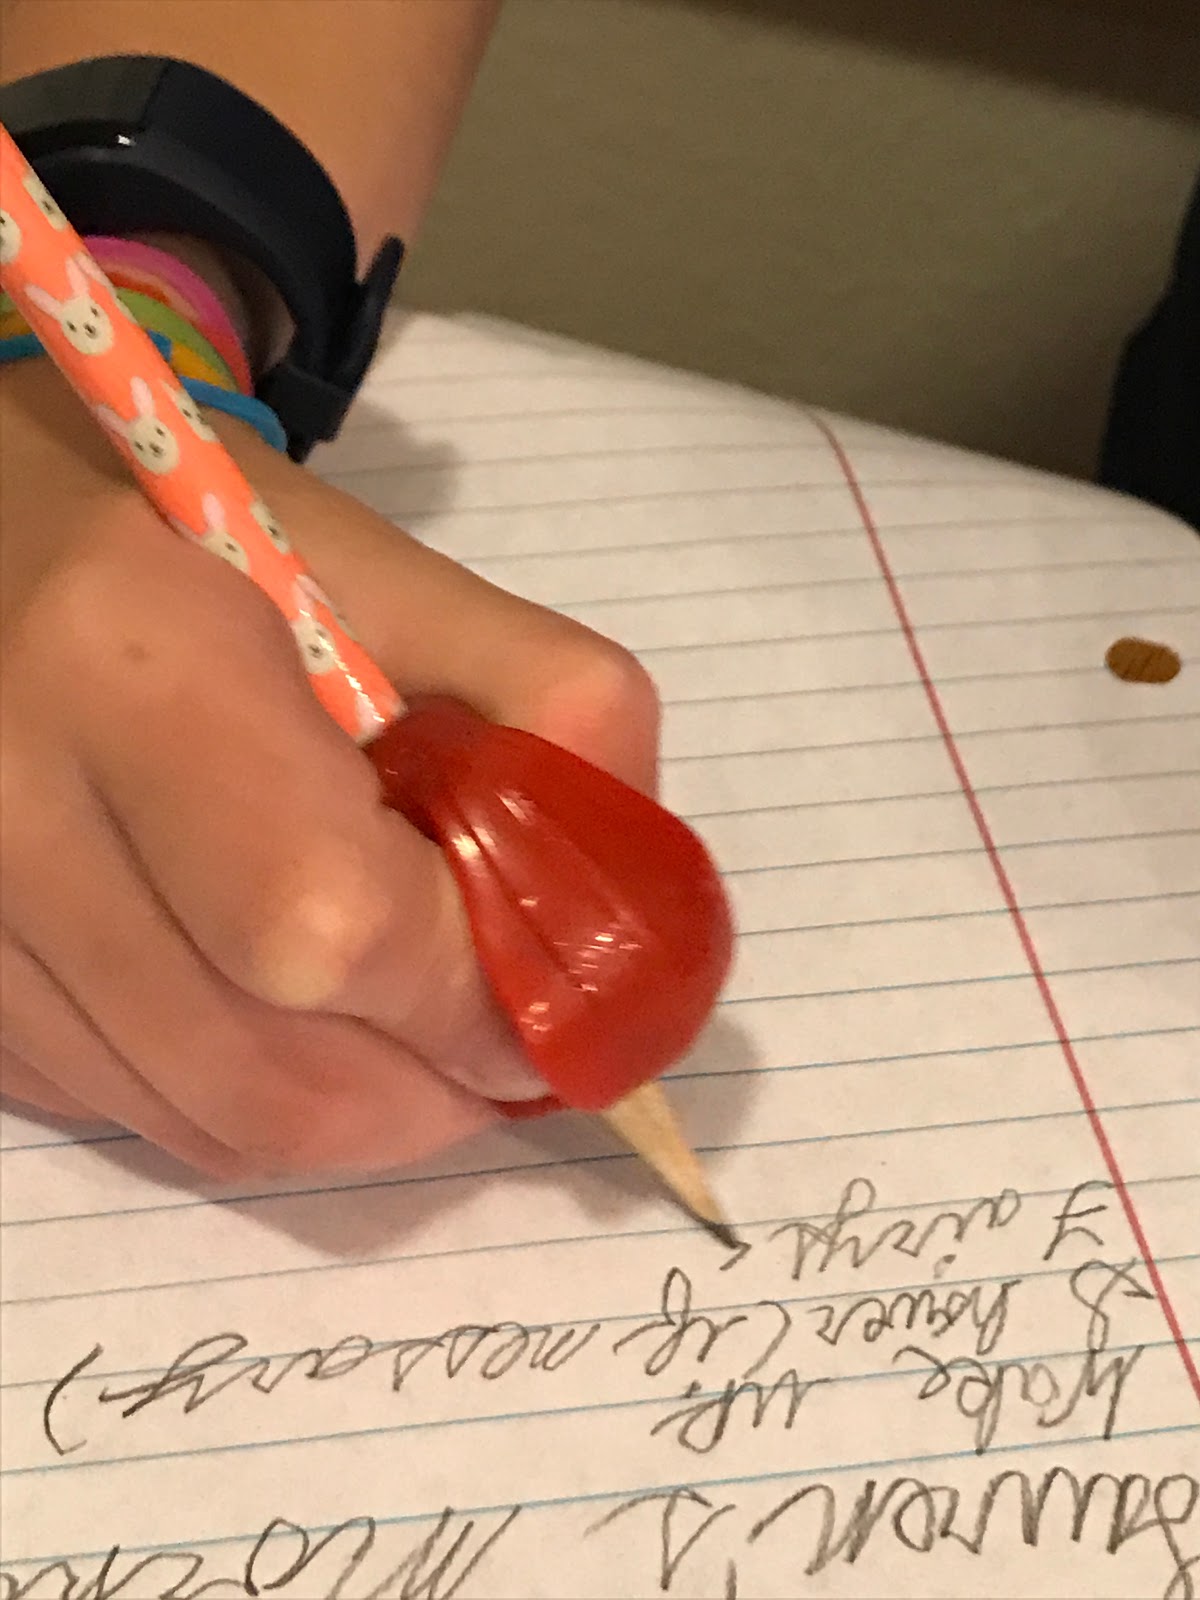
Before jumping into the historical figures I wanted to help Lauren personalize the timeline book and make it her own. She's a bit obsessed with American Girl dolls, and she's actually learned quite a bit about history by reading them. I have a set of American Girl stickers that includes all of the historical dolls, and I suggested placing them on the appropriate dates so that she could see where their stories overlap with other events. Unfortunately, she refused to use the pretty stickers for a school project; she wants to save them for something fun. (In the end, I decided not to push the issue because she's actually quite proficient at remembering which character belongs to which time periodin American history.)

I then suggested writing family member's birthdays in the timeline. The other night we were talking about her great-grandmothers and all the historical events they have lived through. I thought it would be fun to put their birthdates in the timeline and then see which events happened during their lifetimes. Again, Lauren refused. Apparently she didn't think adding family members birthdays was schoolwork and obviously a new history product was schoolwork. In her mind, I should never expect schoolwork and not-schoolwork to meet in the same project. (Again, I let this argument go. We won't put birthdates in the timeline, but I can still talk about them.)

We settled down to simply use the Collection of Historical Timeline Figures for Lauren's timeline binder. There are over 1,260 gorgeous black & white timeline figures included in the CD set (or also available as downloads). I've primarily been using the first CD because it includes the digital files for timeline figures that are appropriately sized for the timeline notebook. The second CD includes individual files for each timeline figure so that they can be resized and added to documents or projects as needed.


Earlier this summer, Lauren read a few books that contained quite a bit of American History facts. I told her that we needed to put them in her timeline so that she wouldn't forget them when we started a formal American History program this fall. The timeline figures are organized chronologically so I just needed to print a few pages. The figures are available either with or without the accompanying text. I chose to use the ones with the text so that Lauren (and I) could have a quick review if we looked back at a historical figure or event we had forgotten.


Lauren balked at the idea of coloring the timeline figures. The detailed black-and-white drawings can be colored, but I don't think it's absolutely necessary. Since coloring isn't one of Lauren's favorite things to do, we agreed that they looked fine without being colored.


When it came time to glue the figures into the timeline binder, I was so, so thankful for the Suggested Placement Guide. I've used timelines in the past, and I've been paralyzed when it came to gluing things down, especially if I didn't know what I'd want to add later. "What if I glue down Christopher Columbus right here and then I run out of room to add the other explorers?" The placement guide shows how all the HISTORY Through the Ages timeline figures will fit into the timeline binder. I simply looked up the correct timeline page and saw how the figures would fit.


Once we glued down all of the timeline figures that Lauren read about earlier this summer, I decided to get a jump start on preparation for next school year.

The Timeline Figures CD contains lists of all the figures on it, organized chronologically within large categories of time. I printed the list of figures for American History and also for the two Biblical periods (Creation to Christ and Resurrection to Revelation).


I then printed out all the early US History figures we will need for this coming year, approximately 20 pages worth. Those sheets are stored in sheet protectors in a binder so we can find them easily. I'm also reading through her textbook materials so that I can mark when we'll come across a figure to put in the timeline. My goal is to keep the timeline current as we go instead of having to play catch up and glue in a bunch of figures all at once.


This year, Lauren schoolwork isn't going to be as hands-on as it has in the past. The HISTORY Through the Ages Timeline Trio is a perfect addition for us right now. It will allow me to show Lauren how the events she reads about in her history textbook fit together to show a bigger picture. My plan is to quickly cover the basics of American History using a textbook approach, and then circle back to do some in-depth studies of the time periods she finds most interesting. When we do that, I'll definitely be looking at some of the Home School in the Woods hands-on history options. I'm particularly looking at the Time Travelers American History Studies which would allow us to spend more time studying the American Revolution, the Civil War, the Great Depression or other time periods. (Some of the options have corresponding American Girl dolls and books, which would be a huge bonus in Lauren's world.)

I am also looking at the new A La Carte options from Home School in the Woods. They have approximately 50 smaller projects that would be perfect for adding in on a week (or even a day) when we have a little extra time to devote to a hands-on project.  I found at least a half a dozen file folder games that correspond to the early American History time period that Lauren will be studying this year, all of them costing less that $5 a piece.


Other Homeschool Review Crew bloggers have been using Home School in the Woods products lately. I'm particularly interested in hearing what they thought about the Time Travelers American History Studies and the Hands-On History Activity Paks. There just might be room to squeeze in Hands-On History Activity-Pak: The New Testament or Hands-On History Activity-Pak:Make-a-State for Lauren this year. Click on the button below to see all the reviews:

Hands-on History {Home School in the Woods Reviews}

Crew Disclaimer

©2009-2017 Through the Calm and Through the Storm. All rights reserved. Photos and content may not be reproduced. http://throughthecalmandthroughthestorm.blogspot.com

Monday, June 26, 2017

Physics: Modeling Nature {Homeschool Crew Review}

Novare Science & Math

I am often amazed at the plethora of homeschool curriculum options in some areas, but at the same time, I'm also surprised at how difficult it can be to find the right option in other areas. When Addison was in high school, we searched high and low for a physics class that met her high standards. She dismissed one curriculum because of math inaccuracies, one because it unnecessarily "dumbed down" the science concepts, and another because it didn't have enough math. (She called the latter one "math for music majors.") She wanted a solid advanced physics course that would prepare her for college engineering classes. She also hoped for calculus-based physics instructions, as opposed to the more popular algebra-based methods. I tried to explain that the majority of homeschool high schoolers are not ready to use calculus in a science class, but she counter-argued that there still should be that option available for the few students who wanted to go the more difficult route.

As I started once again researching high school physics options, I was pleased to find Novare Science & Math. They advertise their materials as being "both true to the historic Christian faith and academically robust." Brennan and I have been examining the Physics: Modeling Nature textbook and a digital version of its corresponding Resource CD so that we could determine if it would meet his need for an Advanced Physics course next year.


Novare believes in a physics-first approach to high school science classes. Their Introductory Physics materials are intended to be used by 9th graders (and up through 11th graders). It emphasizes math concepts but can be completed by a student that is currently taking Algebra I. An advanced introductory option is to use Accelerated Studies in Physics and Chemistry, which is designed for 9th graders who completed Algebra I in middle school.

Physics: Modeling Nature is designed for upper level high school students (probably seniors) who are on a college preparatory path and who have already completed trigonometry. The preface to the book clearly outlines the specific knowledge and skills that a student should be familiar with prior to starting this course. I should note, however, that the topics are fully explained in this text and that a student will have all the information they need, even if they've not fully mastered the topic in an earlier class (or have forgotten it). Brennan has not taken a formal physics class, but he has studied a lot of physics topics during his Science Olympiad preparations the past two years. Since he completed Pre-Calculus last year, Physics: Modeling Nature looks to be at the perfect level for his junior year.

As expected, Physics: Modeling Nature is a serious textbook -- "academically robust" is indeed a good description. The first chapter jumps in with a quick review of matter, mass, the SI unit system, significant digits, and more. It then moves into a detailed explanation of vectors and how to work with them in a mathematical sense (vector addition using trigonometry and vector multiplication). Brennan read through the textbook materials on his own, but then asked my husband (who has an engineering degree) to clarify a few things. The text gives an example using work and explains that common simple definitions of work, such as those used in an introductory physics class, do not account for a force applied in a direction different to the direction  of the movement. 


In chapter 2, I see the first "Connections to Calculus" section. Physics: Modeling Nature never requires a student to know Calculus, but it includes separated sections that explain connections between physics concepts and calculus-based math. Based on Brennan's Calculus schedule, he will not have enough calculus knowledge by the time he is in chapter 2 of this physics book to understand the explanation. He could, however, go back to this section to see a real-life application when he gets to this concept in his Calculus class. I showed one of these sections to Addison, and she thought it was great. In fact, this format was probably what she was looking for when she was searching for an acceptable Physics course for her senior year of high school (when she had already finished Calculus I).


I am very impressed with the quality of solid math and science instruction packed into Physics: Modeling Nature. I am also impressed with Novare's emphasis on mastery learning. The practice problem exercises in each chapter always include at least a handful of general review exercises so that the student isn't as prone to forget the concepts learned earlier in the course. On the other hand, Brennan is still a bit intimidated by this textbook. It's a smaller book than several of his other textbooks -- roughly 7" by 10" instead of 9" by 11." While the smaller size means that it's easier to carry the book around, it also means that the type and diagrams are smaller. He says that everything feels a bit harder because there's less white space on the pages.

In addition to the textbook, Novare offers a Resource CD to help a parent or teacher teach the course. There is a schedule which breaks down the material into daily assignments, quizzes (with answer keys), exams (again with answer keys), and recommendations for teaching. The answers to all of the textbook exercises are included in the back of the book, but full written explanations of those problems are only available in the Solutions Manual (sold separately).


Physics: Modeling Nature is a high-quality advanced Physics course designed for students wanting to pursue a math or science intensive field of study in college. I wish Addison could've found this option when she was looking at homeschool science curriculum a few years ago.

Novare Science & Math offers several other science courses, including Earth Science, Physical Science, Chemistry, and Physics. Homeschool Review Crew members have been using various products for the past few weeks and are sharing their thoughts on the crew blog; be sure to check them out if you are looking for a great science program for your older students.

Biblical Based Science {Novare Science & Math Reviews}

Crew Disclaimer

©2009-2017 Through the Calm and Through the Storm. All rights reserved. Photos and content may not be reproduced. http://throughthecalmandthroughthestorm.blogspot.com

Tuesday, May 23, 2017

Thin Stix {Homeschool Crew Review}

The Pencil Grip, Inc

I always keep a healthy supply of markers, crayons, and coloring pencils available for my children to use either for school projects or just for fun. I recently found a new art supply that I recommend for every family to keep on hand. Kwik Stix solid tempera paint from The Pencil Grip, Inc. is an amazing addition to our art supply closet. Lauren has been using the Thin Stix 6pk of Classic Colors for all sorts of projects lately.


When we received the set of tempera paint sticks, Lauren wanted to try them out right away. It wasn't a great time for me to supervise a messy art project, but I had heard so much about how the Thin Stix were mess-free that I let her dive in without supervision.

Her first project was a simple drawing on regular paper. Yes, regular paper. Not thick paper designed for use with paints or even the heavier cardstock that's hidden away near our office area. She simply grabbed a few sheets of paper out of the printer.


Lauren was immediately impressed with the bright colors. Not only were the colors bright, they easily made bold marks on the page. It was definitely less tedious than trying to color the grass or the sky with markers.

I was impressed that the project truly didn't make any mess. The paint dries so quickly that Lauren didn't even get any smudges on her hands. Because she colored all the way to the edges of the paper, there were some tiny streaks left on the kitchen table when she lifted up the paper. (Remember: she was completely unsupervised and I didn't remind her to put a larger scrap piece of paper underneath.) Those small streaks easily wiped away with a damp rag.

I noticed that the paint was drying so quickly that the paint didn't mix with neighboring colors and suggested that Lauren try a picture with overlapping shapes of different colors. Sure enough, the Thin Stix colors stayed true even when the overlapping lines were drawn immediately after each other. This abstract geometric project was much more fun with the Thin Stix than it would've been with markers that bled into each other making muddy lines at the intersections.


By far our favorite projects with the Thin Stix package were posters. It was a bit difficult to draw details or sign a name on the smaller projects, but the tempera paint sticks write clearly on a larger surface such as a poster.

Lauren made one poster to give to our two Children's Ministers as a thank you for all their work this year.


Later, since we still had the posterboard out, she made an advertisement for our school. I particularly like how she praises the "Great teachers" and tells how we can deal with food allergies and doctors appointments.


I think every family needs to have a set of these Thin Stix tempera paint sticks and a few sheets of posterboard on hand for impromptu sign making. Thin Stix makes it super easy to make a Happy Birthday sign, a large Get Well Soon wish, or even a sign to cheer on your favorite athlete. (It might've embarrassed Brennan if I had made signs to cheer on his baseball team, though.)

The Thin Stix 6 pack of Classic Colors costs $8.49. Thin Stix (and also larger Quik Stix paint sticks) are available at major retailers like Amazon and Toys R Us. The sets range in size from 6 to 24 colors and include metallic or neon colors in addition to the classic colors we've been using.

No Mess Art with Thin Stix Classic Colors {The Pencil Grip, Inc. Reviews}

Crew Disclaimer

©2009-2017 Through the Calm and Through the Storm. All rights reserved. Photos and content may not be reproduced. http://throughthecalmandthroughthestorm.blogspot.com

LinkWithin

Related Posts Plugin for WordPress, Blogger...